If your Lenovo ThinkPad BIOS update failed on Windows 11, the most likely cause is Microsoft’s Vulnerable Driver Blocklist blocking WinFlash64.exe — the tool Lenovo’s update utility uses to write the BIOS. 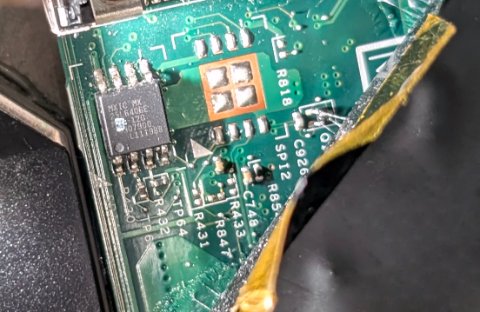 BIOS update failures on ThinkPads have two forms. A soft failure means the update errors out in Windows but your ThinkPad boots normally. A hard failure means the flash started but did not finish, leaving the BIOS corrupted and the machine unable to POST. Each requires a different approach.
Why Lenovo ThinkPad BIOS Updates Fail on Windows 11
In early 2025, Microsoft updated the Vulnerable Driver Blocklist (stored as DriverSiPolicy.p7b) as part of several cumulative updates. This blocklist accidentally flagged WinFlash64.exe, the executable Lenovo uses to write BIOS firmware from within Windows. The affected updates include Windows 10 22H2 (KB5050081, KB5051974, KB5052077), Windows 11 22H2/23H2 (KB5050092, KB5051989, KB5052094), and Windows 11 24H2 (KB5050094, KB5051987, KB5052093). If you installed any of these and then tried updating your BIOS through Lenovo Vantage or the BIOS Update Utility, the update fails silently or with a generic error. Your BIOS is not corrupted — the flash never even started.
Step 1 – Update BIOS Through Windows Update
The cleanest fix when Vantage is failing is to use Windows Update to apply the BIOS update. This delivery method uses the UEFI firmware update capsule mechanism instead of WinFlash64.exe, bypassing the blocklist entirely. Open Settings → Windows Update → Advanced options → Optional updates and look for a firmware or BIOS update under Driver updates. Install and restart when prompted. The update applies during the restart process before Windows loads — do not power off during this step.
Step 2 – Download the Fixed BIOS Utility Directly From Lenovo
Lenovo released a fixed BIOS Update Utility that no longer depends on the blocked WinFlash64.exe. Go to Lenovo’s official support site, enter your ThinkPad model or serial number, filter Drivers & Software by BIOS/UEFI, and download the latest BIOS package. Fixed versions (1.61 and later for many X1 models) no longer use the blocked driver. Run the downloaded .exe as administrator, let the system restart, and allow it to complete the flash before Windows loads. The machine may restart twice — this is normal. Do not cancel or power off during the reboot phase.
Step 3 – Roll Back to a Previous BIOS Version
If a BIOS update installed successfully but caused problems — boot loops, missing hardware, or Windows 11 instability — you may need to flash an older version. ThinkPads have Secure Rollback Prevention that blocks downgrading once a newer version is installed. You must disable it first: restart and press F1 to enter BIOS setup, navigate to Security → UEFI BIOS Update Option, set Secure RollBack Prevention to Disabled, and press F10 to save. Without this step you will see “Secure Flash Authentication Failed” and the rollback will not proceed.
Download the older BIOS package from Lenovo’s support page for your model — version history is sometimes listed, or check the Lenovo Community Forums where users often share direct links. Run the older package as administrator, accept the downgrade warning, and let the machine complete the flash. After rollback, re-enable Secure Rollback Prevention to protect against unauthorized downgrades.
I helped a colleague roll back a ThinkPad X1 Carbon that started hanging on resume after a BIOS update. The rollback took about 15 minutes — the only tricky part was finding the previous BIOS version, as older packages are sometimes removed from Lenovo’s site. We found it through the Lenovo forum thread for that specific model.
Recovery – ThinkPad Won’t Boot After a Failed BIOS Update
If the BIOS flash was interrupted by a power cut or forced shutdown, the ThinkPad may show a black screen or not POST at all. Try a forced hard reset first: disconnect the AC adapter and all USB devices, hold the power button for 10 seconds, wait 20 seconds, reconnect only the AC adapter, wait 2 minutes, then press the power button. Some ThinkPads have a self-healing mechanism — if the firmware backup region is intact, the machine may recover automatically on the next boot. 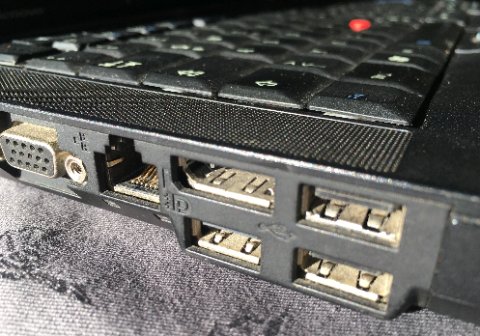 If the hard reset does not work, use USB crisis recovery. On a working PC, download the BIOS
 .exe for your ThinkPad model, extract it to find the .FL1 or .ROM firmware file, and rename it to $0A0000$.FL1 (the exact filename varies by model — check Lenovo’s support page for your specific model). Copy it to the root of a FAT32-formatted USB drive, insert it into the ThinkPad, hold Fn + R, press the power button while holding both keys, release after 5 seconds, and wait for the machine to complete the flash and restart on its own.
Understanding “Secure Flash Authentication Failed”
This error appears when trying to install an older BIOS version while Secure Rollback Prevention is still enabled. It is a firmware-level security check, not a Windows error, and it cannot be bypassed from within Windows. Disable Secure Rollback Prevention in BIOS setup first (F1 → Security → UEFI BIOS Update Option) before attempting any rollback. A separate cause is a model mismatch — always confirm the BIOS package is for your exact ThinkPad model and generation, as a package for X1 Carbon Gen 10 will not flash on Gen 11 even if filenames look similar.
Verify Your BIOS Version After Update or Rollback
Press Win + R, type msinfo32, press Enter, and check BIOS Version/Date in the System Information panel. Alternatively, restart and press F1 to enter BIOS setup — the version is displayed on the main screen.
Per James K., who is an IT Manager at a financial services company, “We manage 200+ ThinkPads and the BIOS update failures from the WinFlash64 blocklist hit us hard. Switching to the Windows Update delivery path resolved it across all machines without needing to touch each one manually.”
Frequently Asked Questions
Why does my Lenovo ThinkPad BIOS update keep failing on Windows 11?
The most common cause is Microsoft’s Vulnerable Driver Blocklist blocking WinFlash64.exe, which Lenovo’s BIOS Update Utility and Vantage use to flash the firmware. Use Windows Update to deliver the BIOS update instead, or download a fixed BIOS package directly from Lenovo’s support site.
Can I roll back my ThinkPad BIOS to a previous version?
Yes, but you must first disable Secure Rollback Prevention in the BIOS setup (F1 → Security → UEFI BIOS Update Option). Without disabling this, you will get a “Secure Flash Authentication Failed” error and the rollback will not proceed.
My ThinkPad shows a black screen after a failed BIOS update — what do I do?
Try a forced hard reset first: disconnect AC power, hold the power button for 10 seconds, wait 20 seconds, then reconnect AC and try booting. If that fails, use USB crisis recovery — download the BIOS file, rename it to the crisis recovery filename for your model, place it on a FAT32 USB drive, and boot while holding Fn + R.
What is the crisis recovery filename for ThinkPad BIOS recovery?
It varies by model. Common names include $0A0000$.FL1 or similar. Check the Lenovo support documentation for your specific ThinkPad model — the correct filename is usually listed in the BIOS update package readme or the support page for that model.
Will disabling Secure Rollback Prevention make my ThinkPad less secure?
Yes, temporarily. With Secure Rollback Prevention disabled, someone with physical access could downgrade your BIOS to a version with known vulnerabilities. Re-enable it immediately after completing the rollback.
Conclusion
Most Lenovo ThinkPad BIOS update failures on Windows 11 are caused by Microsoft’s driver blocklist blocking WinFlash64.exe — not a corrupted BIOS. Switching to the Windows Update delivery path or downloading a fixed BIOS package directly from Lenovo resolves the issue without any recovery steps. For rollbacks, disable Secure Rollback Prevention in BIOS setup first. For hard failures where the ThinkPad won’t boot, try the forced hard reset before USB crisis recovery — many ThinkPads self-heal if the backup BIOS region is still intact.
Ryan holds a Computer Science degree and has over 20 years of hands-on experience with PC hardware, software, and driver troubleshooting. He is the author behind softwaredriverdownload.com, where he helps everyday users fix driver issues quickly and accurately. Ryan has personally tested most of the fixes on this site across a range of Windows 10 and Windows 11 machines.
Leave a Reply