The Dell Inspiron 15 5000 series has an M.2 2280 slot for SSD upgrades, but its exact location on the motherboard and whether it is occupied from the factory varies by sub-model. Some ship with an M.2 SSD only; others include a 2.5-inch HDD alongside a secondary M.2 slot. This guide shows where the M.2 slot is located, how to confirm it supports NVMe, and how to complete the swap.
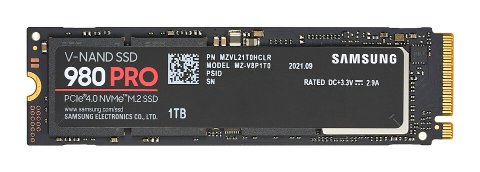
Step 1 – Identify Your Inspiron 15 5000 Sub-Model
- Find the full model number on the underside label (e.g., 5510, 5515, 5520, 5625). The Service Manual for your exact model is the authoritative source for component locations.
- Go to dell.com/support, enter your service tag, and download the Service Manual. Open it and navigate to the Removing the solid-state drive or M.2 card section to see the exact slot location diagram.
- Run CrystalDiskInfo to check whether your current drive is SATA or NVMe. If it shows NVM Express, the M.2 slot supports NVMe. If it shows Serial ATA, the slot may be SATA-only — verify in the Service Manual.
Step 2 – M.2 Slot Location by Generation
| Model | M.2 Slot Location | Form Factor | Protocol |
|---|---|---|---|
| 5510 (Intel 11th Gen) | Lower-center of board, near battery connector | 2280 | PCIe NVMe Gen 3 |
| 5515 (AMD Ryzen 5000) | Upper-right area near fan | 2280 | PCIe NVMe Gen 3 |
| 5520 (Intel 12th Gen) | Center of board | 2280 | PCIe NVMe Gen 4 |
| 5625 (AMD Ryzen 6000) | Center-right of board | 2280 | PCIe NVMe Gen 4 |
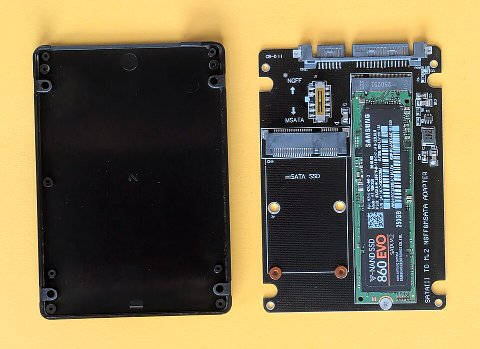
Step 3 – Open the Inspiron 15 5000 Bottom Panel
- Power off and disconnect AC power. Remove the battery if it is external (most 5000 series have internal batteries — skip this if non-removable).
- Remove all bottom panel screws. On many 5000 series models, two screws are captive (remain in the panel) and do not need full extraction.
- Insert a plastic pry tool at the rear edge of the laptop and work around the perimeter. Do not use metal tools — the panel clips are plastic and break easily. The rear edge near the hinge typically has the tightest clips.
- With the panel removed, locate the M.2 2280 slot using the Service Manual diagram for your exact model.
Per Dell’s service documentation for Inspiron 15 5000 series, “The M.2 slot on the system board supports only 2280 form factor solid-state drives. Using a 2242 or 2260 drive requires an adapter bracket not included with the system.”
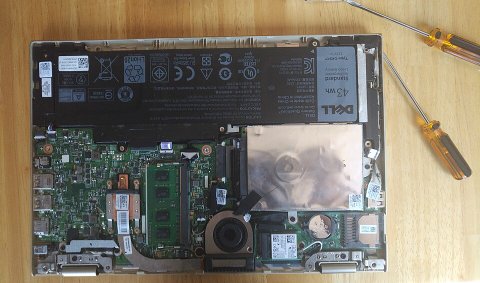
Step 4 – Replace the M.2 SSD
- Remove the single retention screw at the far end of the installed SSD. Set the screw aside — it is small and easy to lose.
- Grip the SSD at its sides and pull straight out. Do not flex it up or sideways while the connector is engaged.
- Insert the new M.2 2280 NVMe SSD at approximately 30 degrees, notch aligned to the slot key. Press it flat and replace the retention screw finger-tight plus a quarter turn.
- If you cloned the original drive beforehand using Macrium Reflect Free (recommended), Windows boots directly after reassembly. If installing Windows fresh, a USB installation drive is required.
Step 5 – Reassemble and Verify
- Seat the bottom panel starting from the front edge and press firmly around the perimeter until all clips engage.
- Reinstall all screws — do not overtighten into the plastic standoffs.
- Power on and press F2 to enter BIOS. Confirm the new SSD appears under Storage → M.2 PCIe SSD.
- Boot into Windows (or the Windows installer) and run CrystalDiskMark to verify NVMe speeds are achieved (sequential read above 2000 MB/s for Gen 3, above 5000 MB/s for Gen 4).
Frequently Asked Questions
The new SSD does not appear in BIOS after installation.
Re-seat the SSD — the most common cause is the drive not fully inserted into the M.2 connector. Also confirm the drive is M.2 2280 and not a different form factor (2242 or 2260 will not reach the retention screw hole). Check the Service Manual to confirm PCIe protocol compatibility.
My Inspiron 15 5000 has both an HDD and an M.2 slot — can I keep both?
Yes. Models with a 2.5-inch SATA bay can retain the HDD as secondary storage while the M.2 SSD serves as the boot drive. Install Windows on the M.2 and use the HDD for data storage. Both drives appear independently in BIOS and Windows.
After the SSD swap, Windows activation shows as inactive.
If you cloned the drive, activation should persist — the digital license is tied to the motherboard, not the drive. If you installed Windows fresh, go to Settings → System → Activation → Troubleshoot and use the option to link the digital license to a Microsoft account for automatic reactivation.
Conclusion
The Dell Inspiron 15 5000 M.2 2280 slot location varies by sub-model but is accessible after removing the bottom panel and one retention screw. Cloning the original drive before the swap eliminates Windows reinstallation and preserves all applications. Confirm the slot supports NVMe via CrystalDiskInfo or the Service Manual before purchasing a Gen 4 drive — Gen 3 and Gen 4 are backward compatible but the Service Manual confirms the slot’s peak supported generation for planning purposes.
Leave a Reply