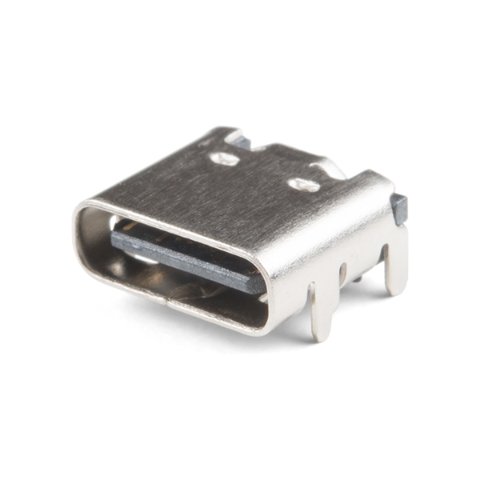
A loose USB-C charging port on the Dell Inspiron 15 is usually caused by accumulated debris in the port, a worn or bent connector from repeated plugging, or in more serious cases, a detached port from the motherboard solder points. This guide covers cleaning, connector inspection, and the full DIY replacement procedure for the charging port on applicable Inspiron 15 models.
Step 1 – Diagnose Whether the Port Is Loose or Just Dirty
- Inspect the USB-C port with a flashlight. Look for lint, dust, or debris compacted at the base of the connector. Even a small amount of debris prevents the plug from seating fully and creates a loose feel.
- Use a wooden or plastic toothpick to gently scrape debris from the port. Do not use metal tools inside the port. Compressed air through the port often pushes debris deeper — toothpick removal is more effective.
- After cleaning, try the charger again. If the plug seats firmly and the laptop charges, the port is not physically damaged and no further repair is needed.
- If the port still feels loose or the laptop charges intermittently depending on cable angle, the USB-C connector is mechanically worn or the board mount is partially detached.
Step 2 – Check Whether the Port Carries Both Charging and Data
| Inspiron 15 Model | USB-C Port Role | Notes |
|---|---|---|
| 5510 (Intel 11th Gen) | Charging + USB 3.2 data | No Thunderbolt; USB-C on left side |
| 5515 (AMD Ryzen 5000) | Charging + USB 3.2 data | No DisplayPort alt mode on this model |
| 5520 (Intel 12th Gen) | Charging + USB 3.2 + DisplayPort | Thunderbolt 4 on some SKUs |
| 5625 (AMD Ryzen 6000) | Charging + USB 4 + DisplayPort 1.4 | USB4 controller in Ryzen 6000 |
Step 3 – Open the Inspiron 15 to Access the Charging Port
- Power off fully and disconnect the AC adapter. Remove all bottom panel screws. Insert a plastic pry tool at the rear edge and work around the perimeter to release the panel clips.
- Locate the internal battery connector on the motherboard. Disconnect it before doing any work near the USB-C port — this is a critical safety step to prevent short circuits during the repair.
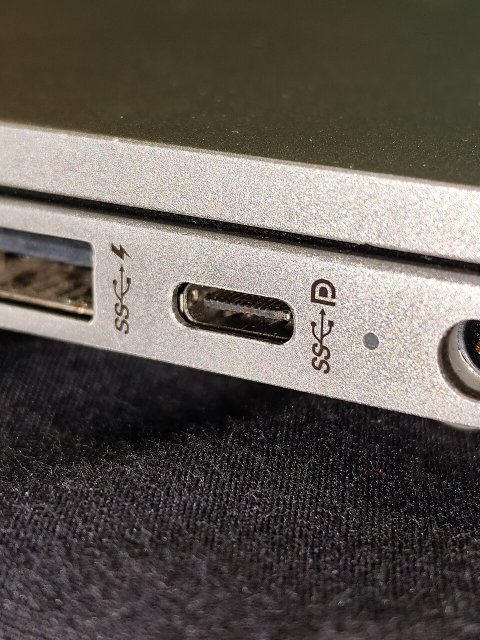
- Locate the USB-C port. On most Inspiron 15 5000 models, the USB-C port is a standalone daughter board connected to the motherboard by a flat flex cable (FFC). Check your Service Manual (available from dell.com/support using your service tag) to confirm whether your model uses a daughter board or a port soldered directly to the motherboard.
Per Dell’s service documentation for Inspiron 15 5000 series, “The USB-C port assembly on applicable models is a separate I/O board connected to the system board via a flex cable. The I/O board is removable and replaceable as a unit without soldering.”
Step 4 – Replace the USB-C Daughter Board
- Locate the flex cable connecting the USB-C daughter board to the motherboard. Lift the ZIF (zero insertion force) latch on the connector using a spudger or fingernail. Pull the flex cable straight out — do not lever it up at an angle.
- Remove the one or two screws securing the daughter board to the chassis.
- Lift the daughter board out. The USB-C port is part of this board — the entire assembly is replaced as one unit.
- Insert the replacement board, secure the screws, and reconnect the flex cable by inserting it into the ZIF connector and pressing the latch down until it clicks.
- Reconnect the battery cable before reassembling the bottom panel.
Step 5 – Test and Reassemble
- Before closing the panel, connect the AC adapter and confirm the charging LED activates or the battery indicator responds. This confirms the new port is seated correctly.
- Power on briefly to confirm Windows loads normally and the charger is recognized in Settings → System → Power & battery.
- Reassemble the bottom panel by pressing firmly around the perimeter until all clips engage. Reinstall all screws, starting from corners.
- Test USB-C data by connecting a USB-C device and confirming it is recognized in Device Manager.
Frequently Asked Questions
My Inspiron 15 charges only through the barrel connector, not USB-C – is the USB-C port for charging on my model?
Not all Inspiron 15 models charge via USB-C. On models with both a barrel connector and a USB-C port, the USB-C port may provide data and display output only. Check the Service Manual for your exact model. If only the barrel connector is listed as the power input, USB-C is not a charging path and its replacement will not restore charging functionality.
Where do I source a replacement USB-C daughter board for the Inspiron 15 5000?
Search for your model’s service tag or model number alongside “IO board” or “USB-C daughter board” on eBay or AliExpress. The part number is listed in the Service Manual parts list. Dell’s Parts & Accessories store (parts.dell.com) also stocks replacement I/O boards for current Inspiron 15 models under the service parts catalog.
The USB-C port is soldered directly to the motherboard on my model – can I still replace it?
Soldered USB-C port replacement requires SMD soldering equipment and is not a practical DIY repair for most users. At that point, the more cost-effective options are a USB-A to USB-C adapter for data use, a Dell-compatible USB-C dock connected via a working port, or a motherboard replacement if charging is impossible through other means.
Conclusion
A loose USB-C charging port on the Dell Inspiron 15 5000 is most commonly resolved by cleaning debris from the connector. If the port is mechanically damaged, most 5000 series models use a replaceable USB-C daughter board connected by a flex cable — a repair accessible to careful DIY users following the Service Manual. Confirm whether your specific model charges via USB-C or barrel connector before ordering parts, and always disconnect the internal battery before any board-level work.
Leave a Reply